User Permissions POST Functions requires an API token with permissions to add and remove users from groups within an Atlassian organisation, this typically means creating an API token under a user account with org-admin permissions across the Atlassian organisation. This guide will walk you through the steps of how to create the API token and store it in the User Permissions POST Functions app and is the first set of steps you need to complete in order to start using the User Permissions POST Functions app in Jira or Jira Service Management.
- Ensure you’re logged in with a user account with organisation admin permissions. One way to do this is to click the cog icon in the top-right when logged into an Atlassian product and the select User Management

If you have the correct permissions, you’ll be presented with the Users page under the Directory tab in Atlassian Admin in a new tab
If you don’t see the above, then you may not have the required permissions, please check you’re logged in with the correct user account or consult with an Atlassian organisation admin. - Once you’ve confirmed the account has the correct permissions, click the cog in the top-right again and click on Atlassian account settings

- Click the Security tab at the top

- Scroll down to click the Create and manage API tokens link

- Click the Create API Token button

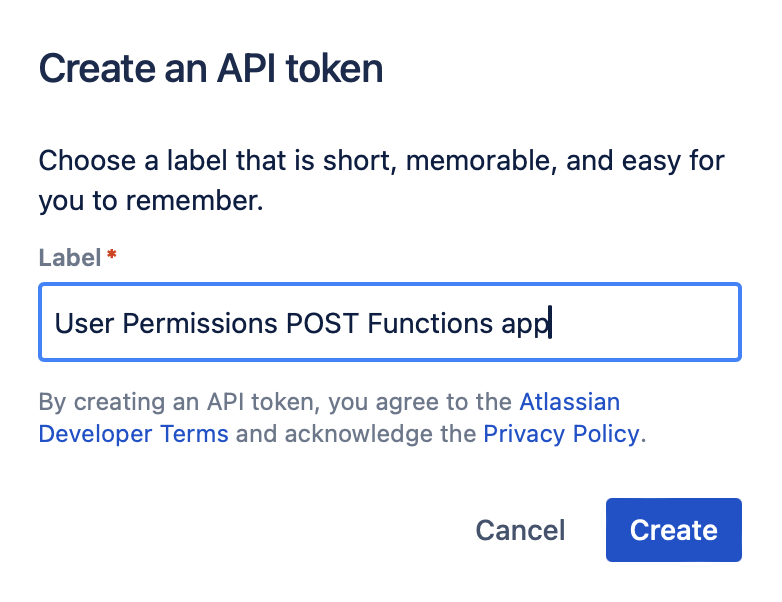
- Specify a label for the API token, e.g. User Permissions POST Functions App and click Create
- Once your API token has been generated you’ll be presented with a dialog box containing the token. Click the Copy button to copy it to the clipboard. Note that once you leave the dialog box you won’t be able to retrieve the token again so it’s recommended that you complete the rest of the steps in a new tab before closing the dialog box

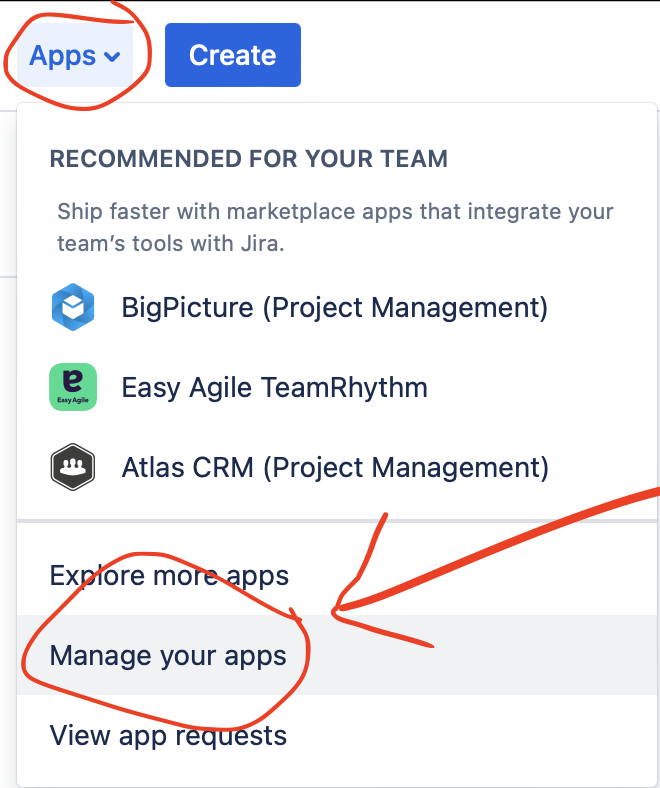
- Open a new tab and browse to your Jira site URL. Click the on the Apps tab along the top and select Manage your apps
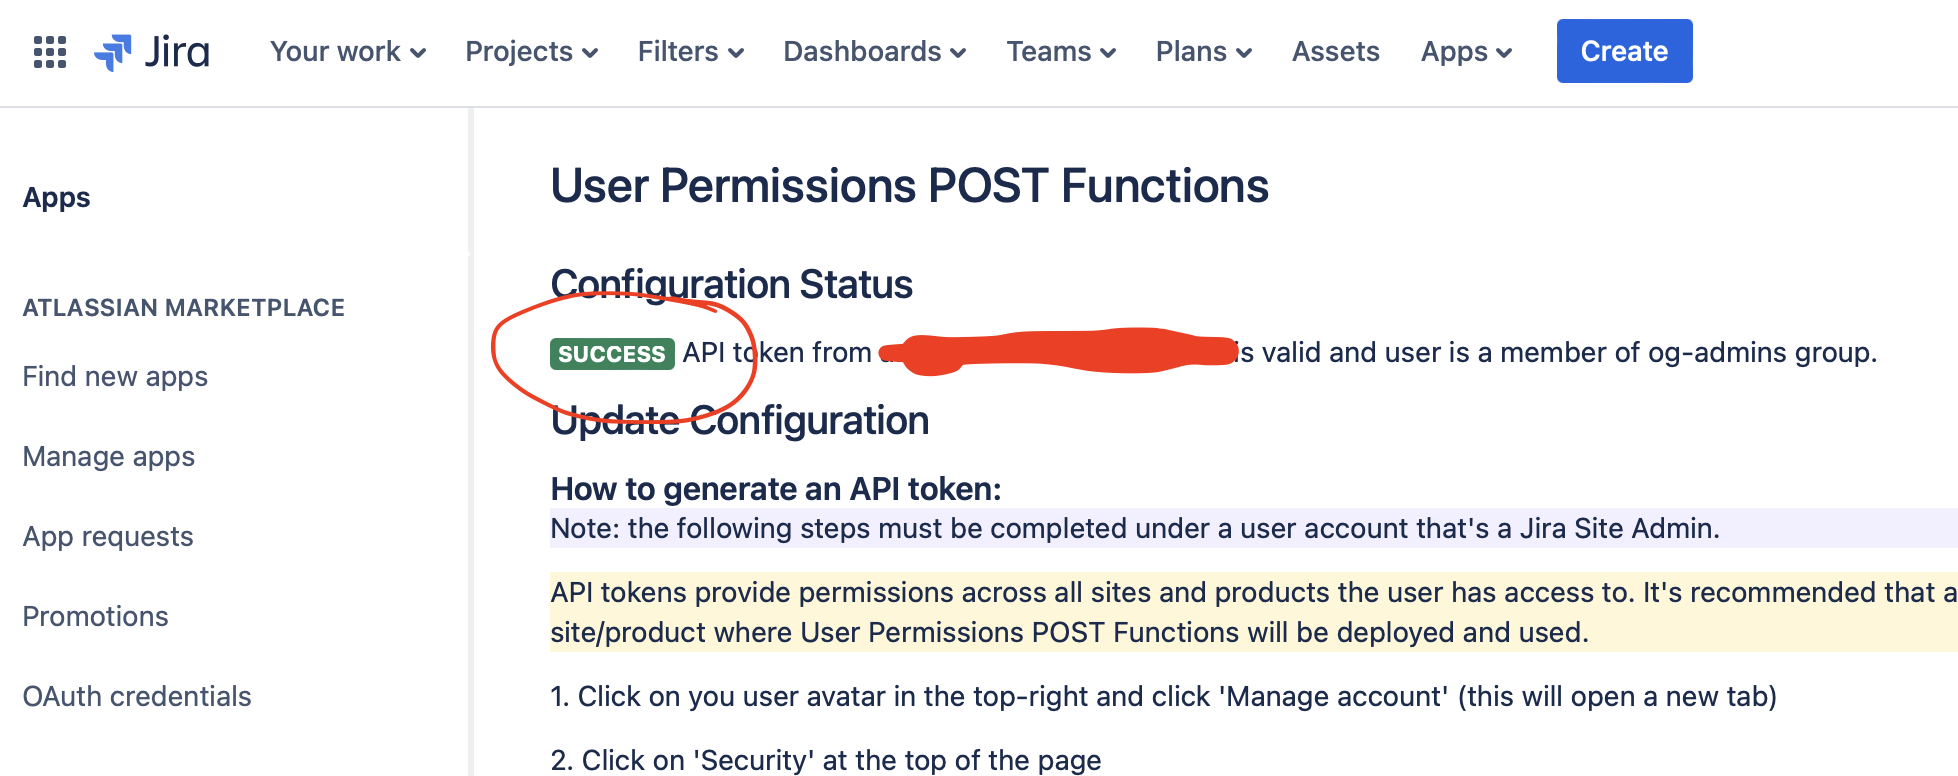
- Click on User Permissions POST Functions down the left hand side

- Scroll to the bottom and enter the email address of the user account you’ve generated the API token under and also the API token. Click Save Configuration

- When the configuration is saved, the app tests the API token to ensure the email address and token are valid, as well as ensuring it has the correct permissions. If you see anything other than this green Success icon then check you entered the correct email address and re-copy the token from the previous tab.
Additional things to consider:
- An API token has all of the same permissions as the user account it has been generated under. This means that if the user is an organisation admin (or other permission level) across multiple organisations then the token will also have those permissions across all organisations. Therefore, it’s recommended that a dedicated user account with access only to the organisation that user Permissions POST Functions will be installed is used to generate the API token.
- API tokens can be revoked by the user or the token will become invalid if the user is disabled or deleted, therefore it may be necessary to repeat these steps again in the future. You can test the validity of the token by clicking Apps – Manage your apps – User Permissions POST Functions in Jira and referring to step 11 of this guide.

You must be logged in to post a comment.